

|
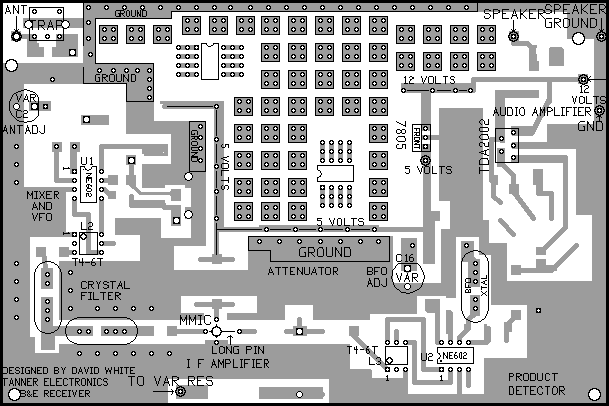
C2, C16 - 85pf Variable "VAR" Caps (orange) - Note flat side
and place as shown on the silkscreen.
TRAP - 10.7mhz Shielded Coil
U1, U2 - SA612 8 pin sockets- Note the "notch" and place as shown on
the silkscreen. Pin 1 is same side as notch. Insert the SA612 after soldering the sockets matching the notches.
L2, L3 - T4-6T Broadband Transformer 6 pin sockets - Pin 1 is the same side as the notch. Pin 1 is the "dot" on the transformer. Insert the T4-6T transformers after soldering the sockets. Dot on the transformer is Pin 1.
3 XTALS - 10 mhz, Two for the filter, one for the BFO. Do not be concerned about the ground wire on the crystal if it breaks off or is missing. The ground wire is the most difficult to solder. Get solder on the leads before applying heat to the board.
U3 - TDA 2002 Audio Amplifier - Do not insert all the way
into the board, leave plenty of room for the heatsink.
Mount the heatsink first before soldering the amp to
the board.
U4 - 7805 Regulator - Note "Front" of device has the part number MMIC - 1651 - Note "Long Pin", Lettering up Total Parts: 62 |
Return to: Amateur Radio Receivers ||
Beginner and Experimenter's Receiver Kit
|| Send E-Mail
